Nidek
Configure Dicom Exports
Please mind that this instruction is being provided by Nidek. If your OCT is not being setup or your interface is different, please contact Tech support at Nidek or your distributor and they can help with the setup or update your OCT software to the latest version.
The recommended settings for macula scan are:
Retina 3D, horizontal b-scans (no Fundus image should be exported with b-scans, no Report format)
Retinal area of interest – from 6 till 12 mm.
Scan Width - 1024
Scan Height - 944
Altris AI analyses the central sector of the retina and does not provide optic nerve analysis
Navis-Ex needs to be version 1.11 or above
A folder needs to be created on the system for the files to be exported.
Create a folder on the desktop called ‘Dicom Images’ and make the customer aware of this folder.
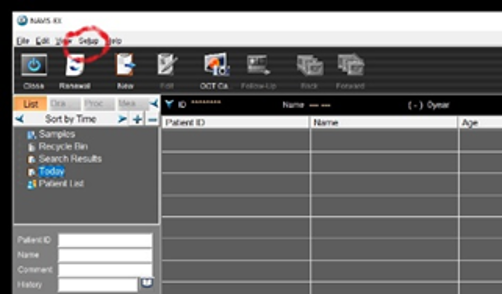
Step 1
Login to Navis-EX
Step 2
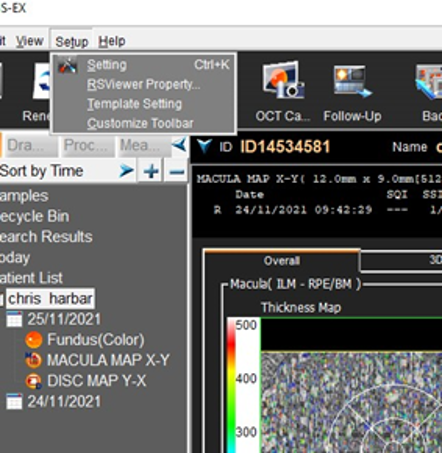
Select “Setup” from the menu bar at the top of the screen
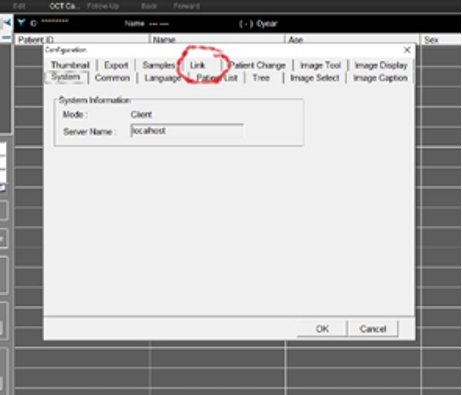
Step 3
Select “Setting” from the drop-down list
Step 4
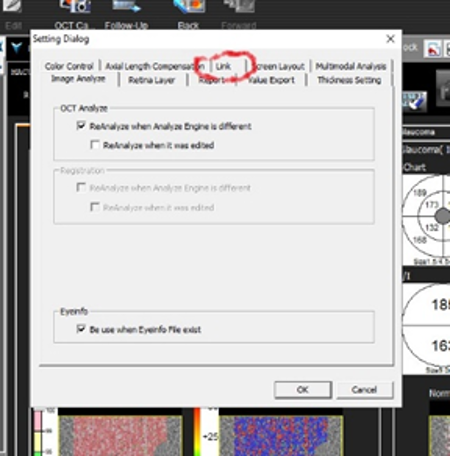
Select the “Link” tab
Step 5
Click the box “Link up with the external system”
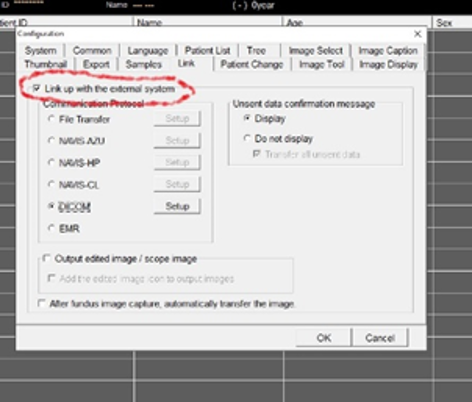
Step 6
Click on DICOM
Step 7
Click on “Setup”
Step 8
In the box “AE Title” enter NIDEK OCT
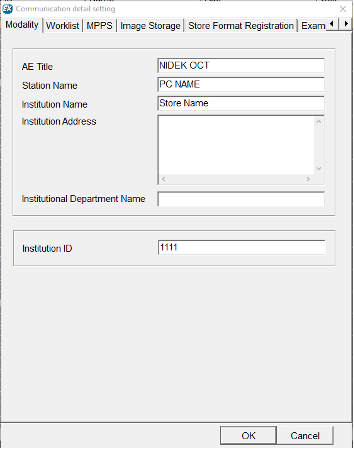
Step 9
In the box ‘Station name’ enter the hostname of the PC being used e.g. RSD-CAPTURE001.
Step 10
In the box, “Institution Name” enter the store name and location.
Step 11
In the box “Institution Id” enter the ODS code if referring to the NHS. If not available leave it blank.
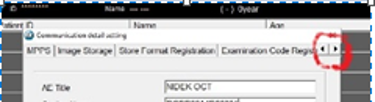
Step 12
Using the arrows move to and click on the tab “Image Storage
Step 13
Click on “Store Images”
Step 14
Click on “Select DICOM File Output Destination”
Step 15
Click on the folder icon
Step 16
Select the folder you created in pre-requisites ‘DICOM Images’.
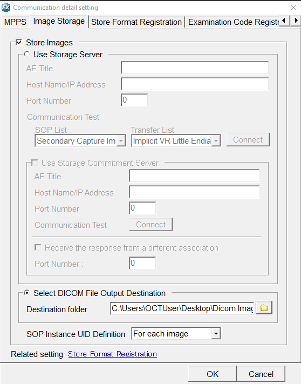
Step 17
Click OK and the mapped drive will be shown in the “Destination folder” window.
Step 18
Click OK
Step 19
Click OK on the next screen
Step 20
Select a patient from the patient list
Step 21
Select and display any OCT scan (not fundus image) for the patient
Step 22
Select “Setup” again from the menu bar at the top of the screen
Step 23
Select “RSViewer Property” from the dropdown list
Step 24
Click on the “Link” tab
Step 25
Within the DICOM box click on OCT.
Step 26
Click OK
Step 27
Return to the patient list.
Note: This configuration process only needs to be performed once.
Exporting an OCT in DICOM format:
Step 1
Select a patient from the patient list
Step 2
Select and open an OCT scan
Step 3
Select the “Overall” tab
Step 4
Select the “Send data to other systems” icon
Step 5
A DICOM file of the scan will be present in the “Dicom Images” folder

Updated about 20 hours ago