Pathology Progression
In Pathology Progression tab you can:
-
Trace pathology progression by adding up to 8 examinations at the screen.
-
Progression section allows tracing the state of pathology and its transformation with time.
-
Examinations can be placed sorted out by severity or date - from oldest to newest exam and vice versa.
-
A comprehensible graph indicating the change of the central layer thickness is available here as well.
-
Trace the change of the central sector thickness in real-time.
Click on the Progression tab to go to the screen for comparing current and historical scans to detect changes over time
* All names included in this User Manual are not real and are for demonstration purposes only
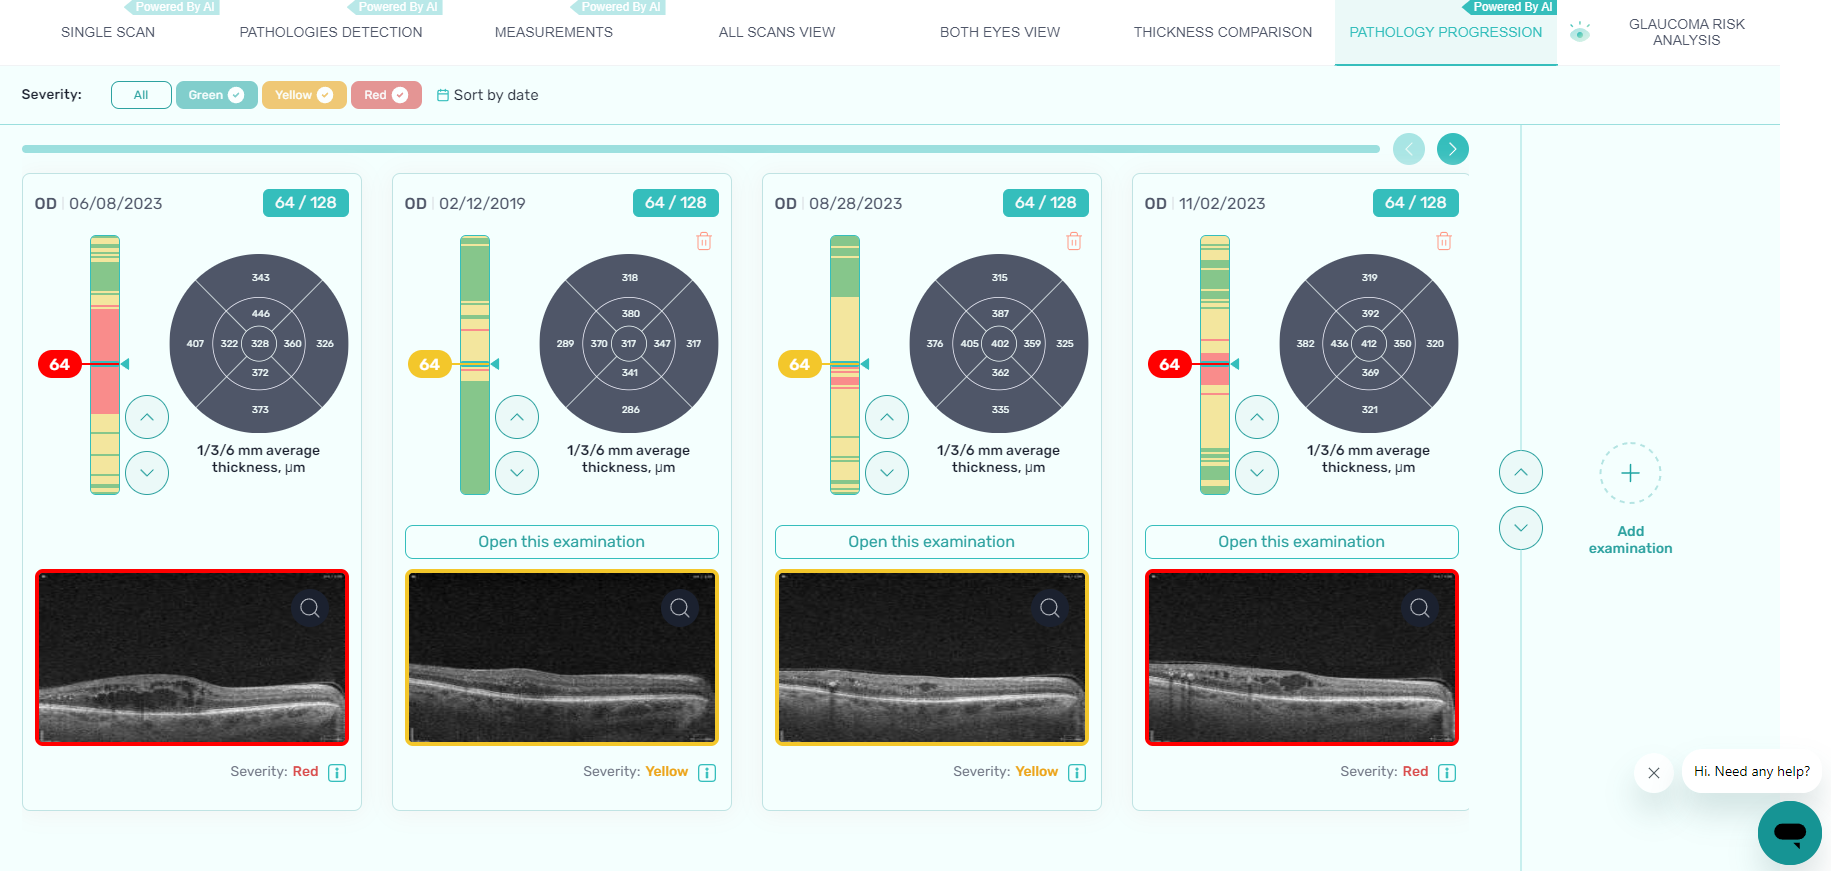
Progression tab consists of the following compounds for multiple examinations:
-
Examination date
-
Button to remove examination from comparison
-
OCT severity detection map with the option to browse through them and select the specific one
-
Filter scans by order of severity: all, green - normal retina, yellow - moderate concern, red - high concern
-
Scan number
-
Selected scan
-
Scan zoom icon (user can review a particular scan in its original size)
-
Arrows to change scan selection
-
Sync scrolling - you can look through examinations simultaneously to see pathologies progress
-
+Add examination button to add new examination instead of selecting already given scan
-
Layer thickness (average, single, multiple, GCC thickness)
You can easily track pathology progression by adding several examinations on the screen, as well as by placing exams in a convenient order.
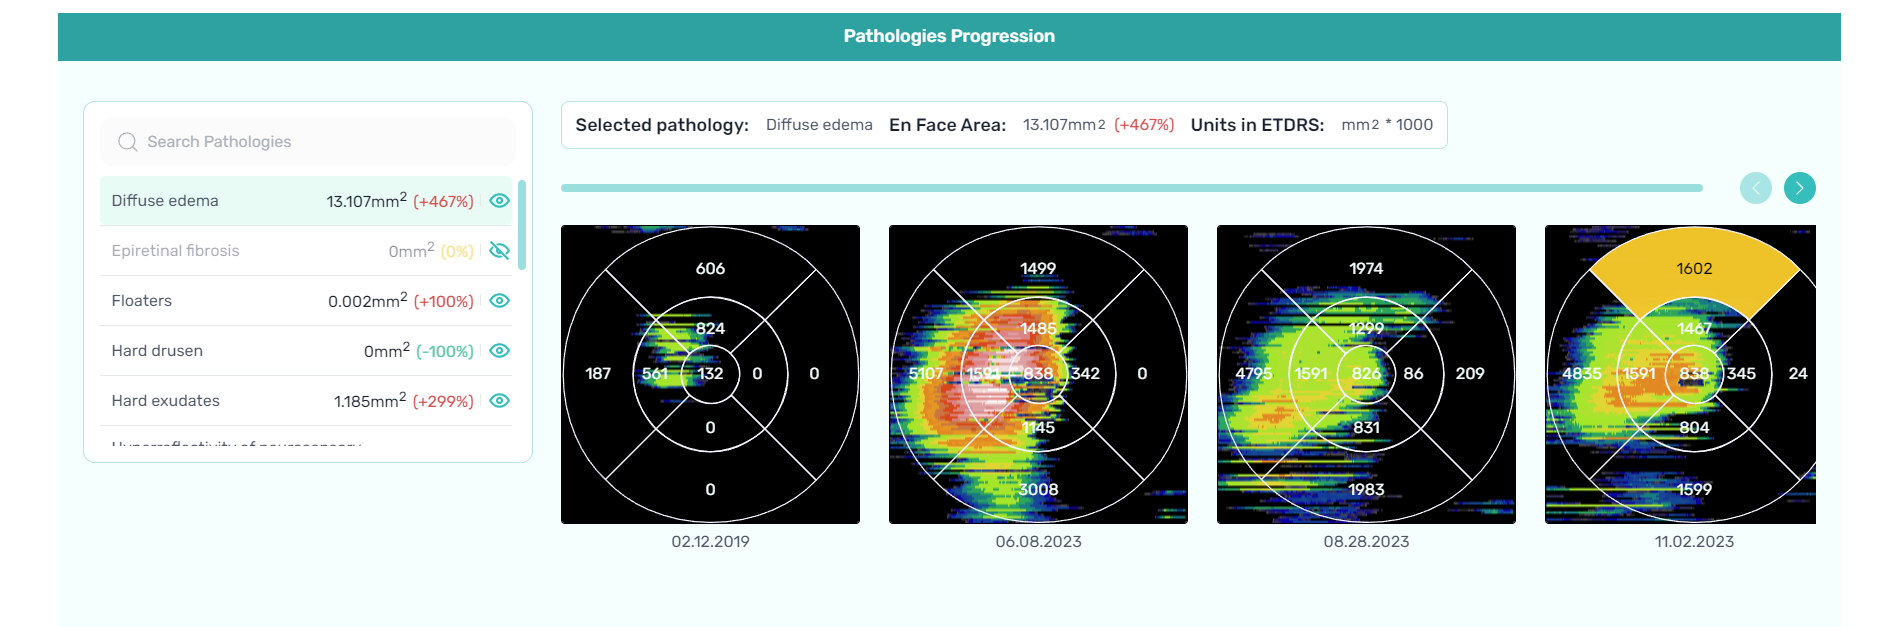
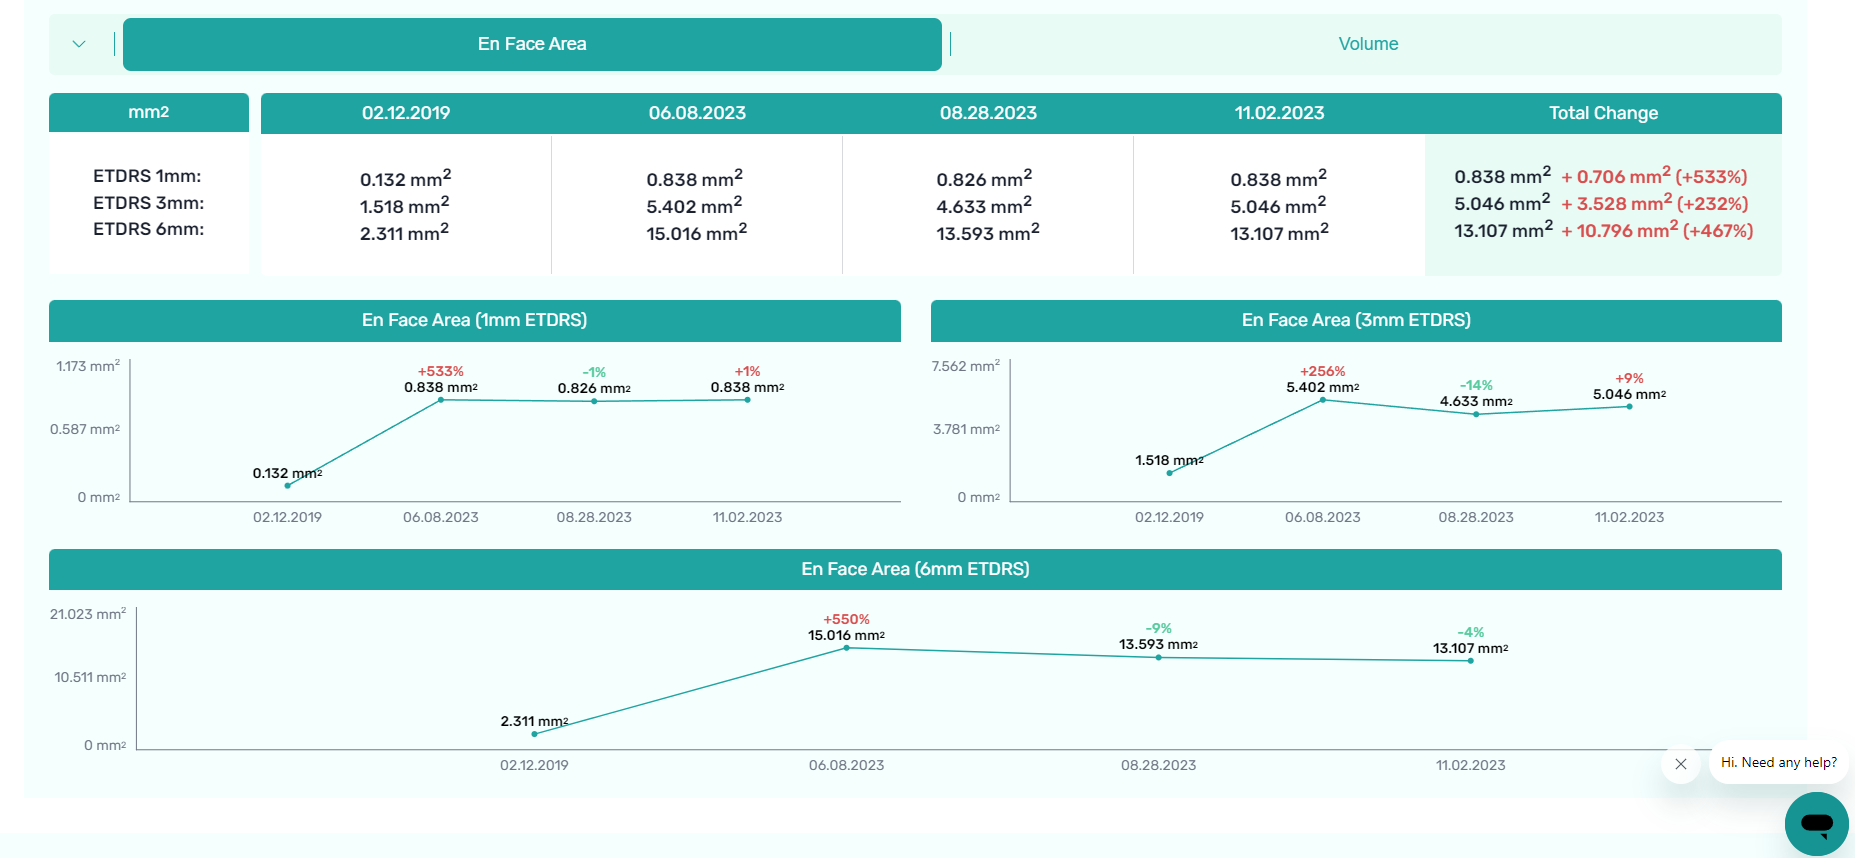
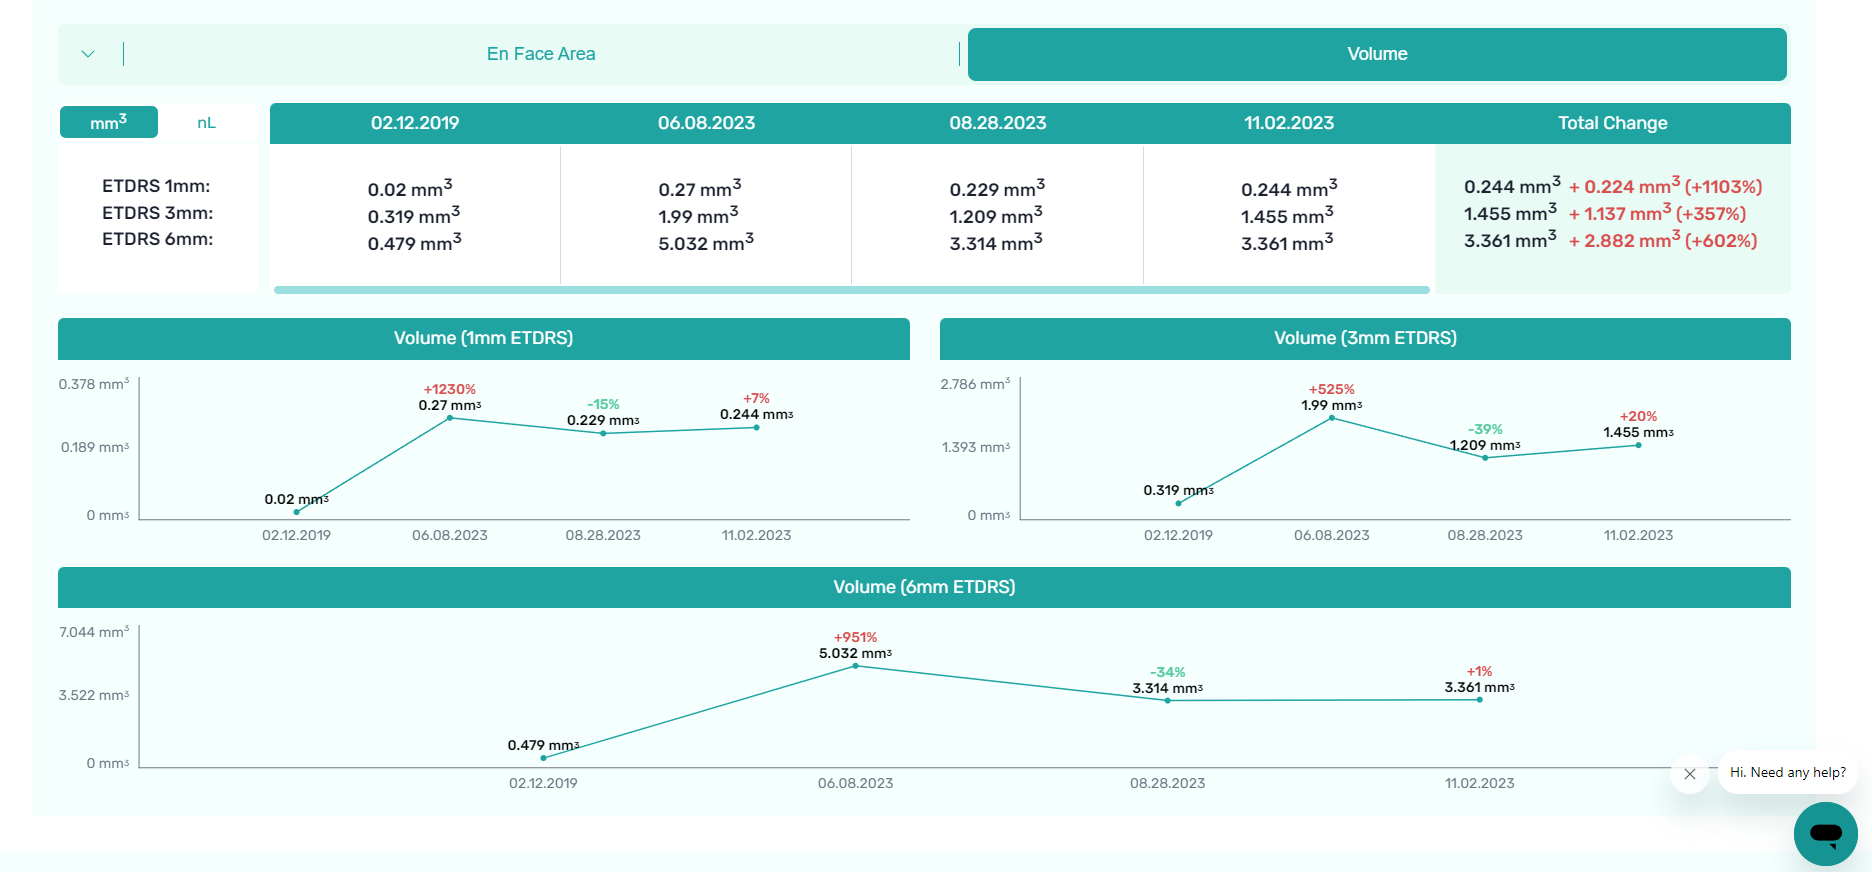
Select a particular biomarker and track changes to the thickness of the central sector over time and views the graph of changes (table at bottom of page). In case you don't want some of the biomarkers to be included in your report, click on the 'eye' icon beside the biomarker, and it will not be reflected in your report.
En-Face Area
Volume
Updated 5 months ago