Zeiss export from Forum
These instructions are only for CIRRUS instruments connected to ZEISS FORUM data management software solution. The creation of OPT IOD DICOM files cannot be done on a CIRRUS that is NOT connected to FORUM.
Please mind that this instruction is being provided by Zeiss. If your OCT is not being setup or your interface is different, please contact Tech support at Zeiss or your distributor and they can help with the setup or update your OCT software to the latest version.
Please select the OP and OPT option, you should be able to see a B-scan thumbnail in FORUM. Please note this will only send the OP and OPT for new scans completed after this option was selected.
To set DICOM options:
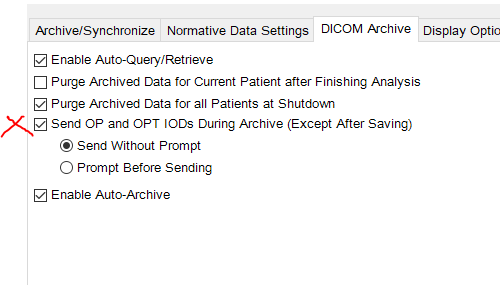
- Select the DICOM Archive tab.
- Check Enable Auto-Query/Retrieve.
- Enable auto-archive
Archive Todays Exam After Finishing Analysis - To enable exporting image files in a standard DICOM format,
check Send OP and OPT IODs During Archive (Except After
Saving) and select either:
Send Without Prompt to disable prompt for export, or
Prompt Before Sending to enable prompt for export. - Click OK.
This will enable a change to Workflow as the customer will now have to Analyse the data to enable all RAW and B-Scan data to be sent to FORUM.
Objective:
- Obtain OPT IOD DICOM formated CIRRUS data
- RAW CIRRUS DICOM data is not usable
Assumptions:
- FORUM is installed and all CIRRUS data is archived to FORUM
- CIRRUS instrument is installed and configured to archive to FORUM
Notes about Data in FORUM archive
- This data cannot be converted to the OPT IOD format
- ONLY data that is captured after the setting is enabled will allow the creation of OPT IOD DICOM formatted data
- IMPORTANT NOTE: enabling the OPT IOD DICOM Setting will degrade the archiving performance of the CIRRUS Device
To enable the CIRRUS software to create DICOM OPT IOD when connected to FORUM:
From the CIRRUS software screen on the instrument
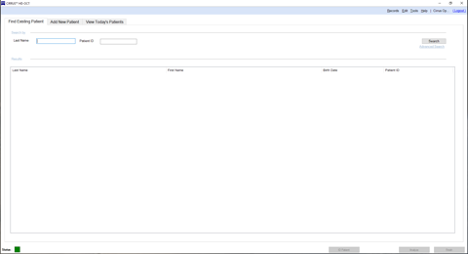
Select the records option in the top right of the screen
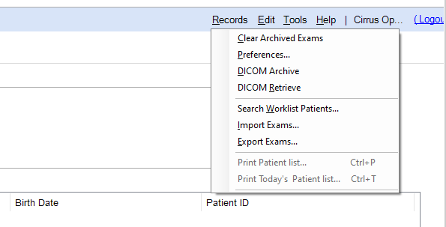
To set DICOM options:
- Select the DICOM Archive tab.
- Check Enable Auto-Query/Retrieve.
- Enable auto-archive
- To enable exporting image files in a standard DICOM format,
check Send OP and OPT IODs During Archive (Except After
Saving) and select either:
Send Without Prompt to disable prompt for export, or
Prompt Before Sending to enable prompt for export. - Click OK.
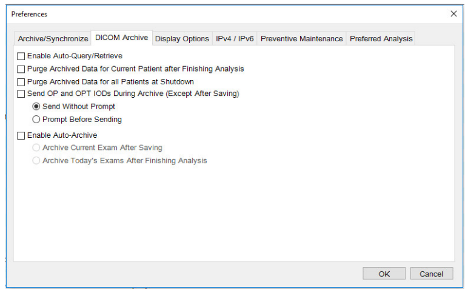
All data capture once this setting is turned on will now create the OPT IOD DICOM file along with the DICOM RAW data and be archived to FORUM
This setting will work for the following :
- Mac cube 512x128
- 5 line raster scans
Open your FORUM software
You will now see both the generic raw data icon for the 512X128 cube scan, and you also see a cube scan I can of the actual b-scan slice
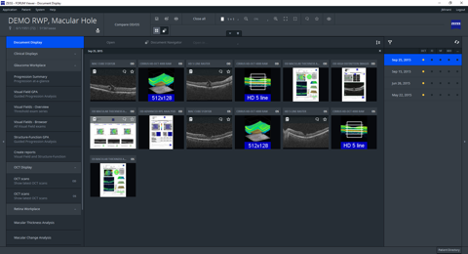
The OPT IOD scan types are now exportable
Double click the scan you wish to export
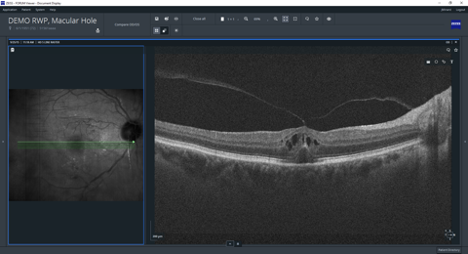
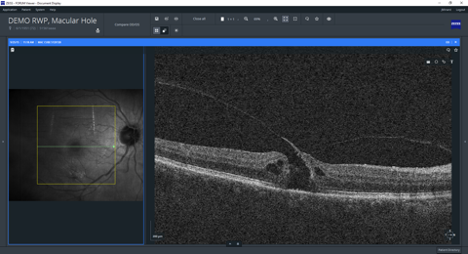
At the top of the screen click the icon that looks like a floppy disk

You must choose a location to export your DICOM OPT IOD file too.
Select the browse button for the file location you wish to export too
Select file type as DICOM
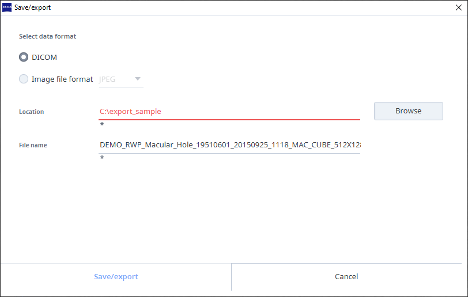
Once you have export your file type you can now upload to the Altris AI platform
Updated about 1 month ago
